CMake-gui Windows Tutorial
Note: This is an -updated- version from the previous tutorial for HW0, and hopefully does NOT require any external dependencies! As a staff we will be most familiar with the following build procedure, and will be in the best position to help debug build errors if following this tutorial.
This tutorial will be a step-by-step process of building project 1 for Windows Visual Studio 2017. For this tutorial, download the following:
-
Visual Studio 2017 with Visual C++ Support. This links to a tutorial that will not only download Visual Studio, but also the necessary Visual C++ libraries needed to run and compile C++. Additionally, this will configure your computer with the MSVC C/C++ compilers necessary to compile your projects.
-
CMake: CMake-gui Download. CMake is a program that helps configure and keep track of C/C++ project files for compiling and building. This installs both the GUI and the command line tool. This tutorial shows how to use the GUI.
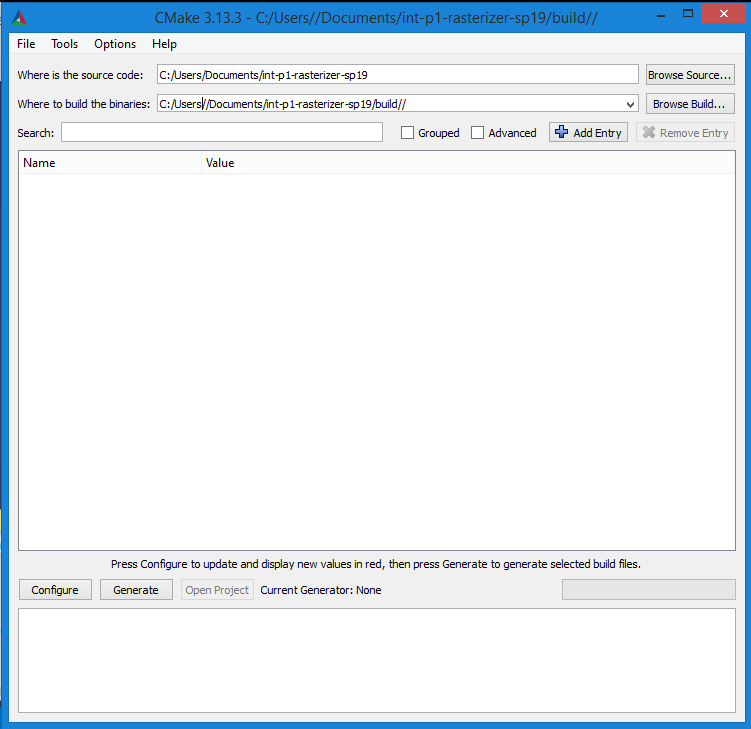
Open CMake-gui. The following window should display upon opening CMake-gui. There are two paths that are required for cmake to configure and generate projects, the source code directory and build directory. The source directory should be the one corresponding to the git directory pulled (make sure that the source directory contains a CMakeLists.txt file!) The build folder, if not already created, can be added by you; it acts as a way of separating the binary files compiled from the source code). The build folder will also include our executable files once built, so remember where this is! Locate the corresponding folders for the project:
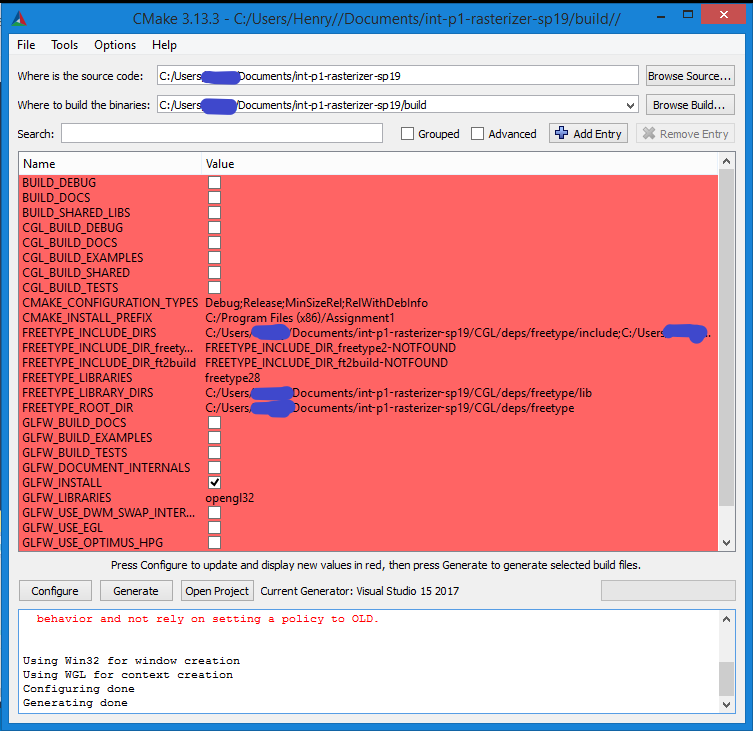
Now, press configure. This will read the CMakeLists.txt files, and configure the project for the correct compiler. A pop-up will occur, asking what kind of project file should be generated, and for what architecture. For our projects, Visual Studio 15 2017 (SUPER IMPORTANT: Specifically select the "Visual Studio 15 2017" option even on 64 bit machines) will be used, which will generate project files for Visual Studios (some library dependencies included in the project are build specifically for Win32-bit systems, not 64 or 86).

The red highlights will display the optional cmake flags that are listed in the CMakeLists.txt (optional files to build), the configuration types, and CMAKE_INSTALL_PREFIX, where the default final .exe will be built. This tutorial, and projects in this class, will just use the default settings that display; no need to change anything.
Now, press generate. This will generate the vcproj, and Visual Studio-specific project files to be used.
Click open project. Visual Studios will now open and load in the project files. On the right is the solution explorer, which allows navigation through the project files. Specifically for project 1, we are interested in the draw tab. Click the draw tab. Now, go ahead and at the top, over the Build tab, press build Solution or draw (solution will compile a few extra files, but for this small project we're only concerned with draw).
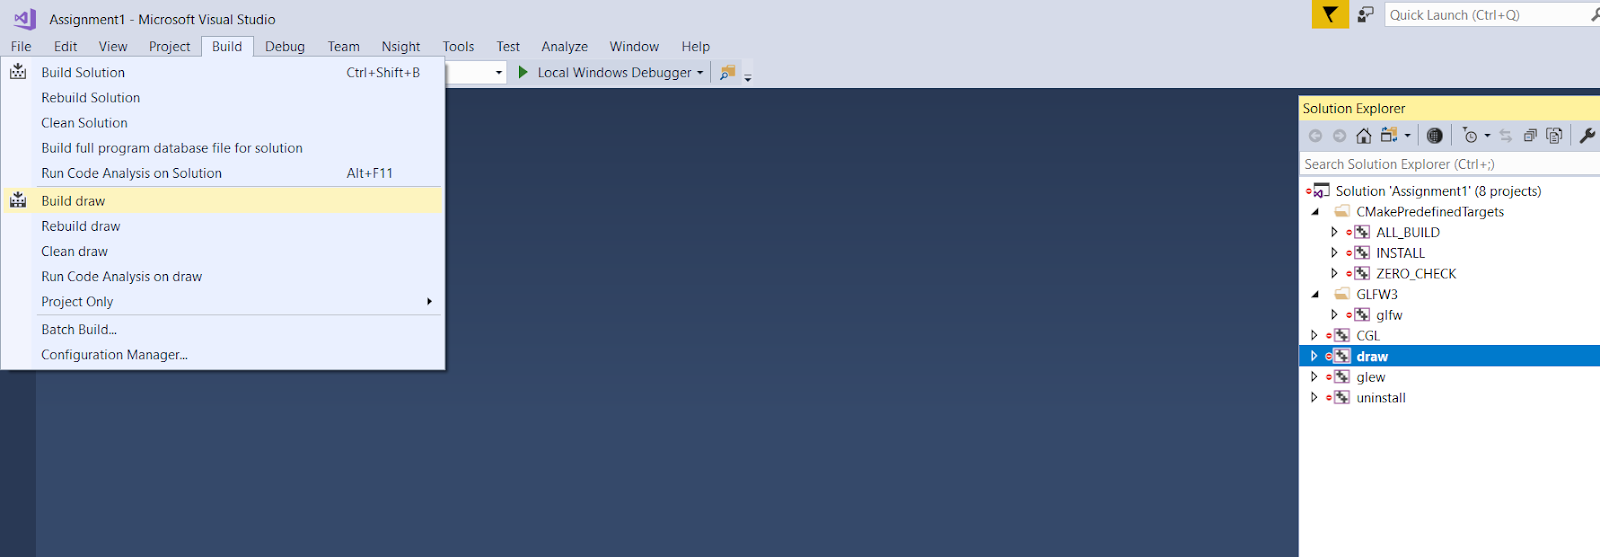
Hopefully, the Output at the bottom reads that all builds have succeeded. Awesome! If we look at the top near the Green Play button, there's something that might say "Debug". This is the Build type generated by Visual Studio, meaning if we go to our build/Debug/ folder, we should be able to find our executable.(this is Visual-Studio specific, really; you can change to Release mode as well; this flag exists just for sake of changing build types and thus how many files Visual Studio needs to build and link, so as to not have to build the whole project every time).

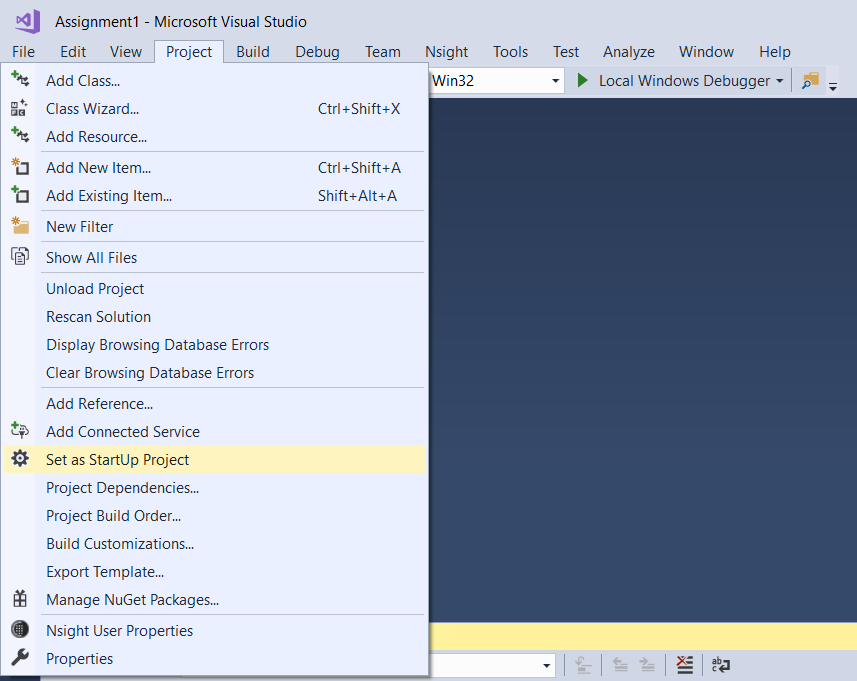
At this stage, we're almost done. If we notice a few things, there is a local Windows Debugger to step through our program, as all good IDEs do. In order to do this, though, we have to set a few settings for ourselves. First, Visual Studio needs to know what executable to run (by default, it tries to run ALL_BUILD, which is definitely not what we want): to do this, go to Project -> Set as Startup Project. This will tell Visual Studio exactly which executable to run.
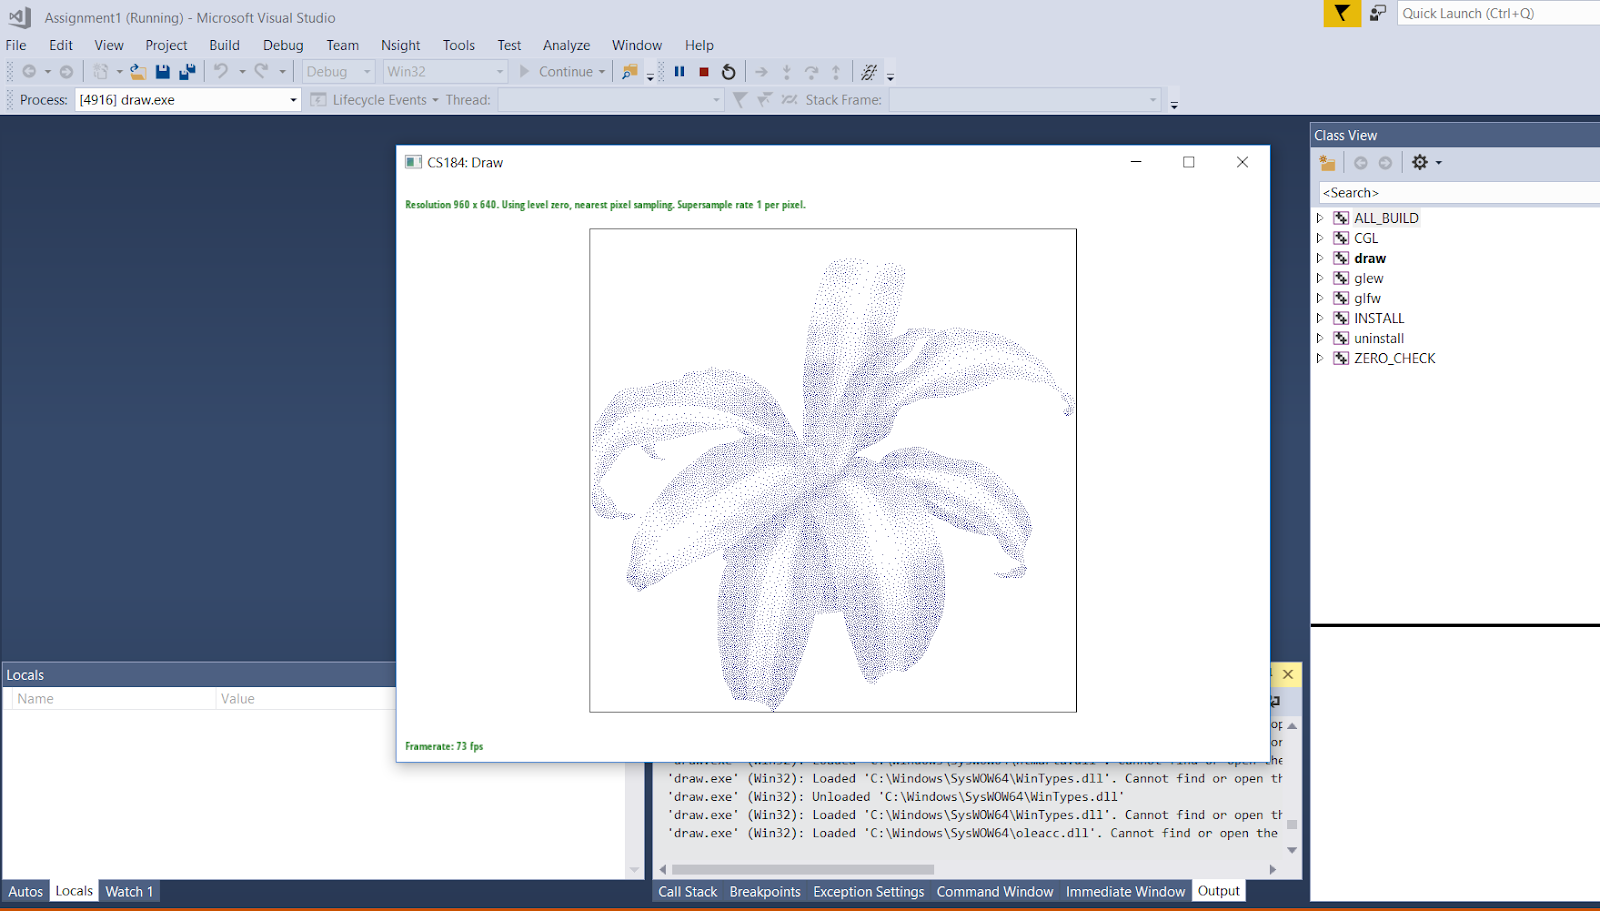
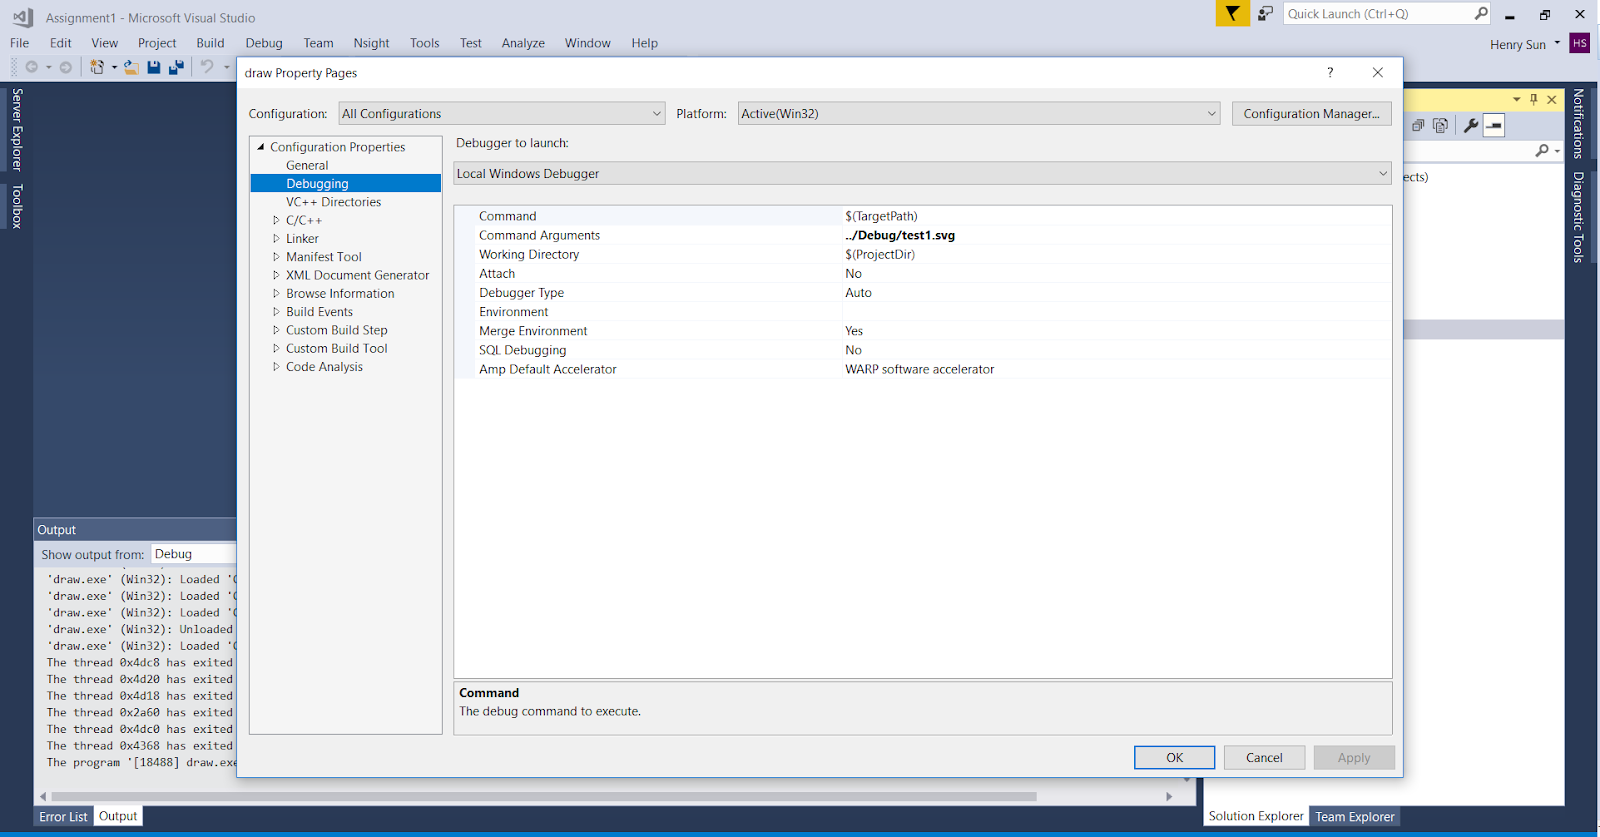
Additionally, in this class, most executables will be run with command line arguments. To run specific command line arguments, go to Debug -> draw (-or-whatever-the-project-is-called) Properties -> Configuration Properties -> Debugging -> Command Arguments, and type in whatever is necessary (Important note: these arguments are run in the Working Directory specified right below, so the path to the file we're running must be set accordingly; you can check what this evaluates to by hovering over and clicking the ... at the right end of the line). For this tutorial, I manually moved test1.svg to the same folder as the executable.
Now, try pressing the green button, and hopefully everything runs! (NOTE: If you haven't implemented part 1 yet, only a blank screen will likely appear. But at least you've verified the program runs) Hooray!