Rendering
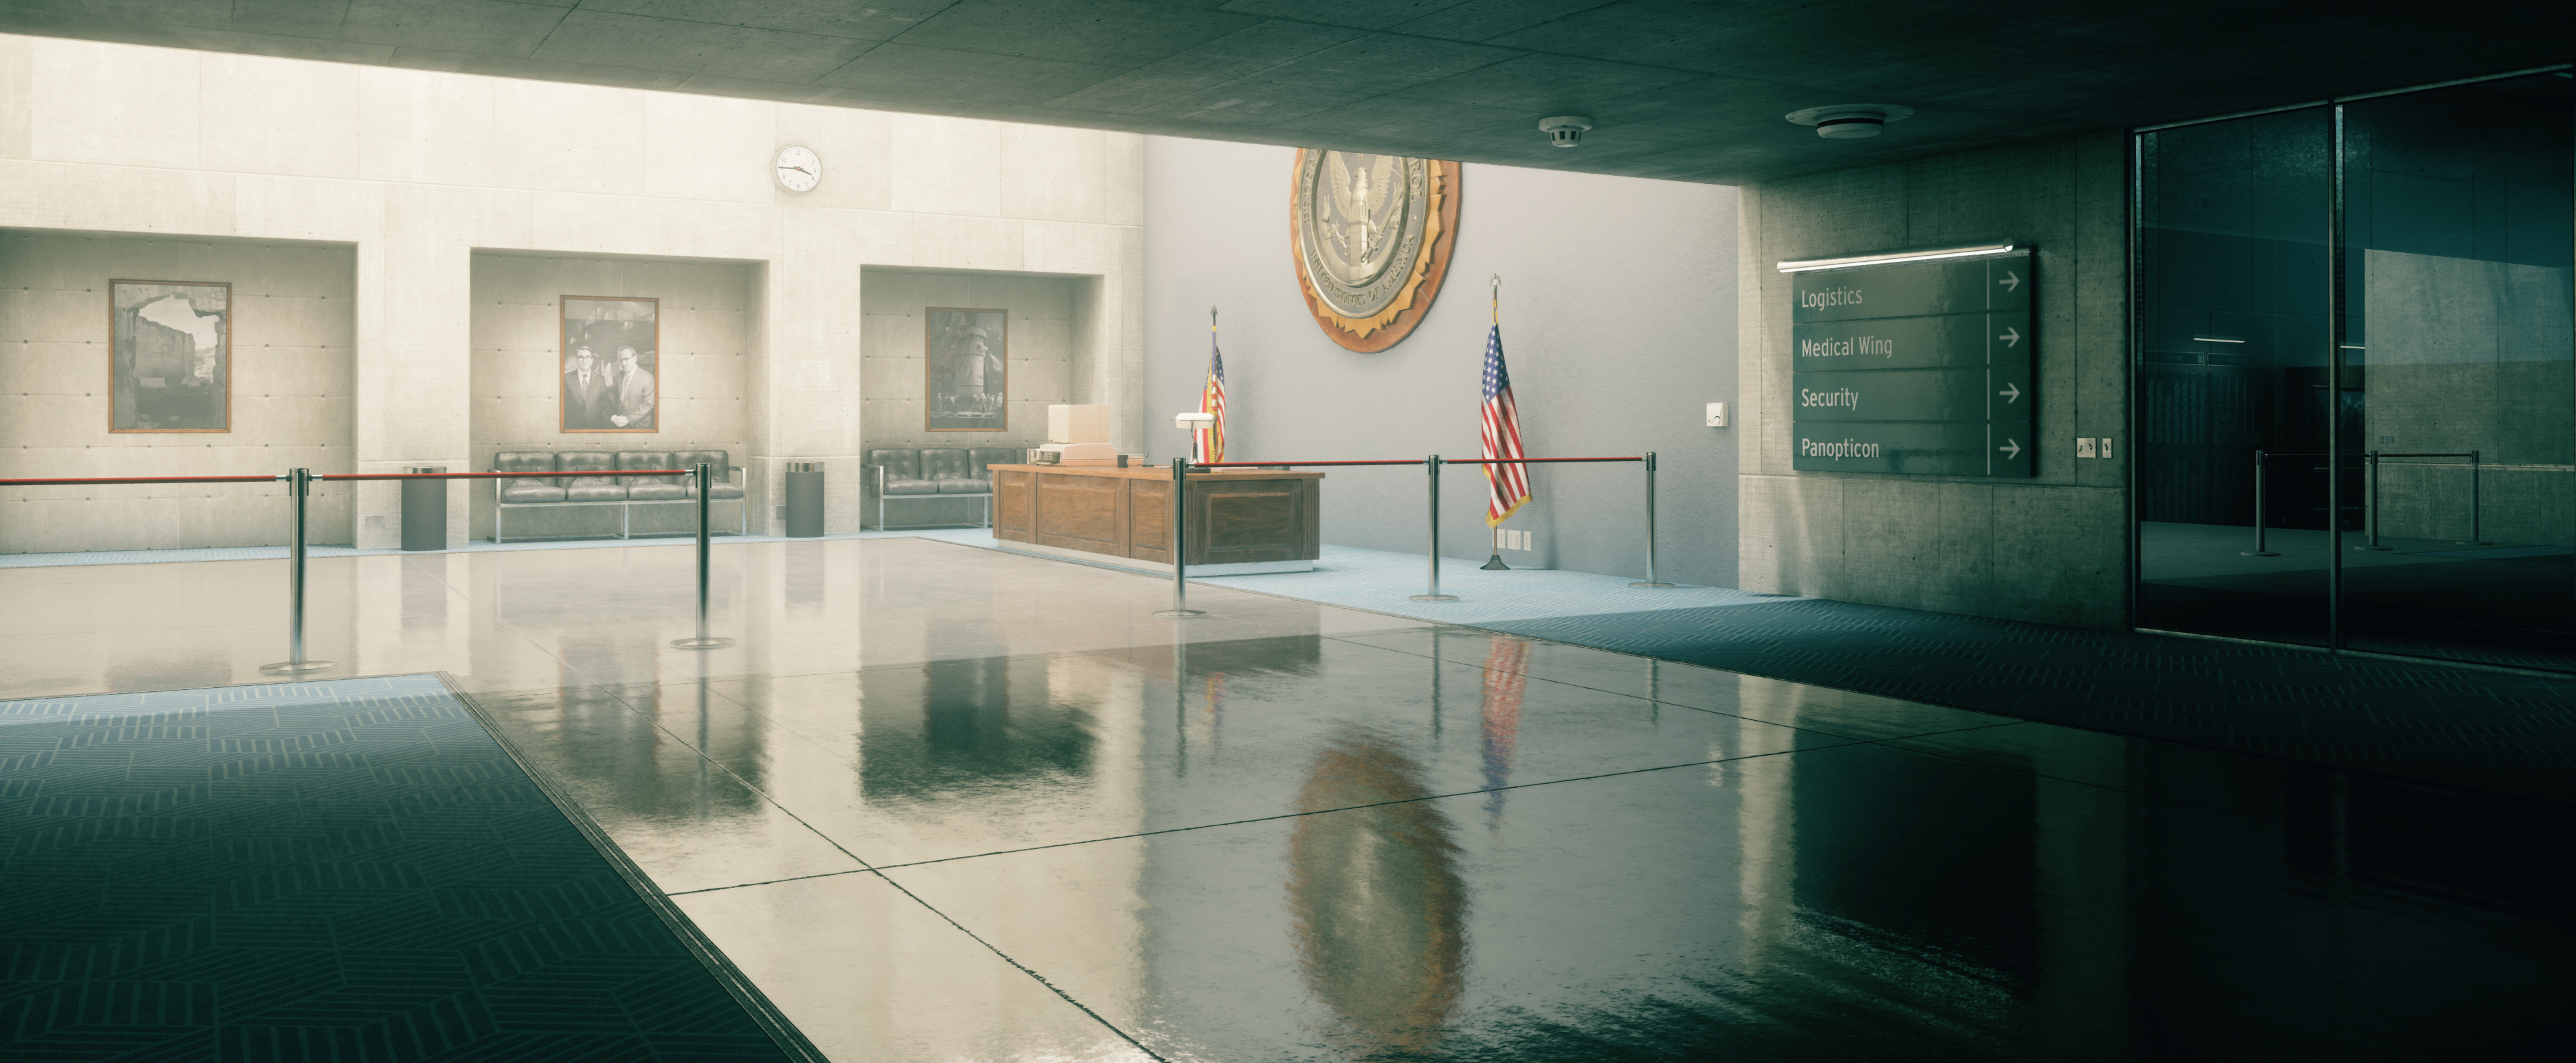
Rendering Volumetric Scattering (Difficulty Level: 2.5)


Source: Disney
In project 3, you implemented surface rendering where it is assumed that light only scatters when it hits a surface. In this case, the rendering equation is an integral over all surfaces in the scene. However, this surface rendering technique is not able to render some cool volumetric scattering effects like the fog shown above.
To model volumetric scattering, you need to compute an integral over all volumes and all surfaces in the scene. You can do this by modifying your path tracer. The main difference is that a ray may get scattered before it hits any surface in volume. You may find the following resourses useful for the project.
This chapter of Wojciech Jarosz's thesis introduces some basic concepts about volumetric scattering. This paper by Lafortune and Willems has implementation details. You can skip section 4 of the paper for a simple path tracing implementation.
Scattering Effects in a Participating Media (Difficulty Level: 2.0)

Source: Bo Sun
This paper offers a physically based approach to rendering fast and efficient atmospheric scattering effects in real time for isotrophic point lights.
Progressive Photon Mapping (Difficulty Level: 2.5)


You may have noticed that the path tracer in project 3 is very inefficient when rendering caustics. To improve caustics rendering, you can implement a technique called photon mapping. Photon mapping is more efficient on caustics because it allows path samples to be shared across pixels. The core part of photon mapping is a stucture to lookup photons inside a sphere in the scene. Options for the structure include KD-tree and hash grid. Chapter 15.6 in PBRT is a good reference on photon mapping.
However, photon mapping is a biased method! Intuitively, it will always give you a blurred shading result, since the shading point is using the photons from its neighborhood. You need to consult this paper on progressive photon mapping to improve it.
Bidirectional Path Tracing & Multiple Importance Sampling (Difficulty Level: 3.0)

Path tracing is not almighty. When there are caustics or glossy inter-reflections, it performs poorly. To deal with that, we can implement BDPT (Bidirectional Path Tracing) by shooting half-paths from both the camera and the light, then connecting them somewhere in between.
Also, remember that in this project, when the roughness of a surface is low, our renderings will tend to be quite noisy. To reduce this noise, we can use multiple importance sampling (MIS), which is also a necessary component of implmementing BDPT.
Add texture support for our project framework (Difficulty Level: 1.5)

Our project framework (path tracer for assignment 3-1 and 3-2) still doesn't support textures! But you can make it work :)
Rendering / Material Modeling
Subsurface Scattering (Difficulty Level: 2.0)

Here is the seminal 2001 paper with a dipole approximation. Newer methods have greatly improved on this, but it's a good place to start. This has lots of complicated math, but once you understand what it is trying to do, it will be much easier to implement.
Hair Rendering (Difficulty Level: 2.5)

Source: Eugene d’Eon
Check out Marschner et al., the paper cited in class. You may also find this paper useful. You will face a tough problem if you want to ray trace hair curves. So we recommend you use Mitsuba Renderer, where ray-hair intersection is already implemented.
You're also welcome to implement Lingqi's state of the art fur reflectance model.
Rendering Glints (Difficulty Level: 2.5)

Source: Lingqi Yan
You can add textures to your path tracer too! After that, you can extend the microfacet model to support glints! Checkout this paper and this paper for guidance on an implementation of glints using high resolution normal maps. You're also welcome to implement the stochastic glints model without normal maps.
Here is a guide to doing this with ray differentials (a slightly offset ray traced next to your main ray that lets you calculate mipmap levels). You will need it to compute a pixel's coverage on the texture.
Cloth Rendering (Difficulty Level: 1.5)

Source: Iman Sadeghi
We know that the cloth can be rendered in three ways: as actual fibers, as participating media and as a surface. Here, we recommend you a simple surface model to render more interesting cloth.
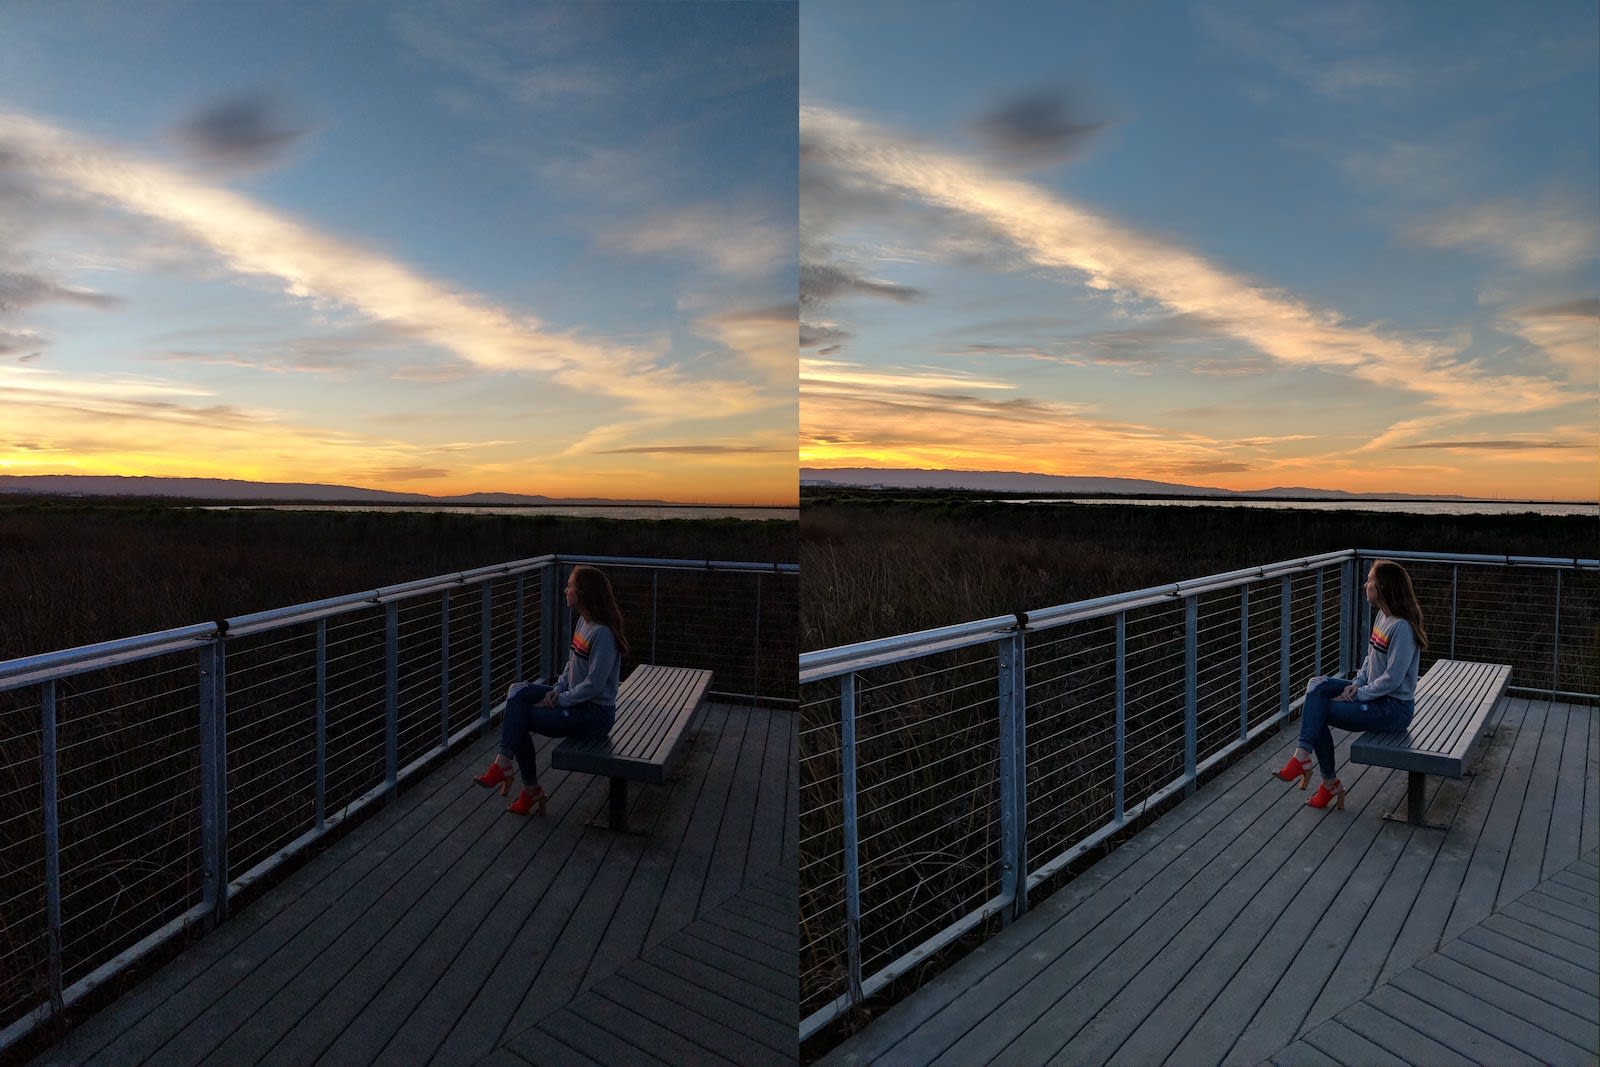
Two-Shot SVBRDF Capture (Difficulty Level: 2.0)

Source: Miika Aittala
To measure a BRDF, we fix the shading point and change the incident/outgoing direction while measuring the light. However, this method is too difficult when we want to measure SVBRDF (spatially-varying BRDF), which is always different when we move the shading point.
It turns out that you can actually do SVBRDF capture using just your smartphone! You need two shots of the same scene from the same position, one with flash on and the other with flash off. Check out this paper.
If you're feeling ambitious, there's a follow-up paper that describes a method to capture the SVBRDF in just one shot!
Approximate Bidirectional Texture Function (Difficulty Level: 2.0)

Source: Nvidia
BTF's, analogous to BRDF's, are a method of capturing realistic material properties from converting images of a material in varying light conditions into a texture that can be sampled from in a shader program. Check out this paper for an introduction to the BTF.
Real-Time Graphics
Screen Space Ambient Occlusion (Difficulty Level: 2.0)


Source: Unity 3D
In project 3, you've implemented Phong shading. You may still remember that the ambient term is a constant and doesn't seem interesting. Ambient Occlusion (AO) is a way to increase the realism of the ambient term. (Some advanced methods may even be able to fake the global illumination!) Theoretically, Ambient Occlusion shoots shadow rays uniformly on the hemisphere to see how many rays are blocked within a certain distance. But Screen Space Ambient Occlusion (SSAO) can approximate this just in the image plane, and is real-time, and is pervasively used in video games!
There are many algorithms for ambient occlusions, you can explore the difference between them. Which one gets the most convincing result, and which one is more performant?
Cloth Simulation using OpenGL shader (Difficulty Level: 2.5)

We can extend the CPU cloth simulation onto the GPU using OpenGL shaders, which are powerful enough to achieve this parallelization without needing to touch CUDA. Here is a ShaderToy demo. With this, we can improve our cloth simulation project with better accuracy as well as implement additional features such as accurate self-collision!
GPU path tracer using NVIDIA OptiX (Difficulty Level: 2.0)

Source: Nvidia
NVIDIA OptiX is a cool set of APIs built on top of CUDA to allow GPU ray tracing. It natively supports efficient BVH construction and ray-triangle intersection. We can write a path tracer on GPU using OptiX to support all effects in project 3. As a reward, we can expect a 10x speed up!
Real-time ray tracing on GPU (Difficulty Level 3.5)
Source: Nvidia
Now as the new GPU architectures like Turing from Nvidia and RDNA2 from AMD, the future of tripple A game visuals likely going to include real time ray traced effects. Explore API options like DirectX ray tracing or Vulkan ray tracing to create interactive ray tracing / path tracing demos that brings realistic game visuals!
Visual / Rendering mods for games (Difficulty Level 1.5~3.5)

There are mods like Reshade / Minecraft Shaders Mod that can modify and inject shaders program into existing game engines. There are also people creating remastered graphics for old games like Quake 2!
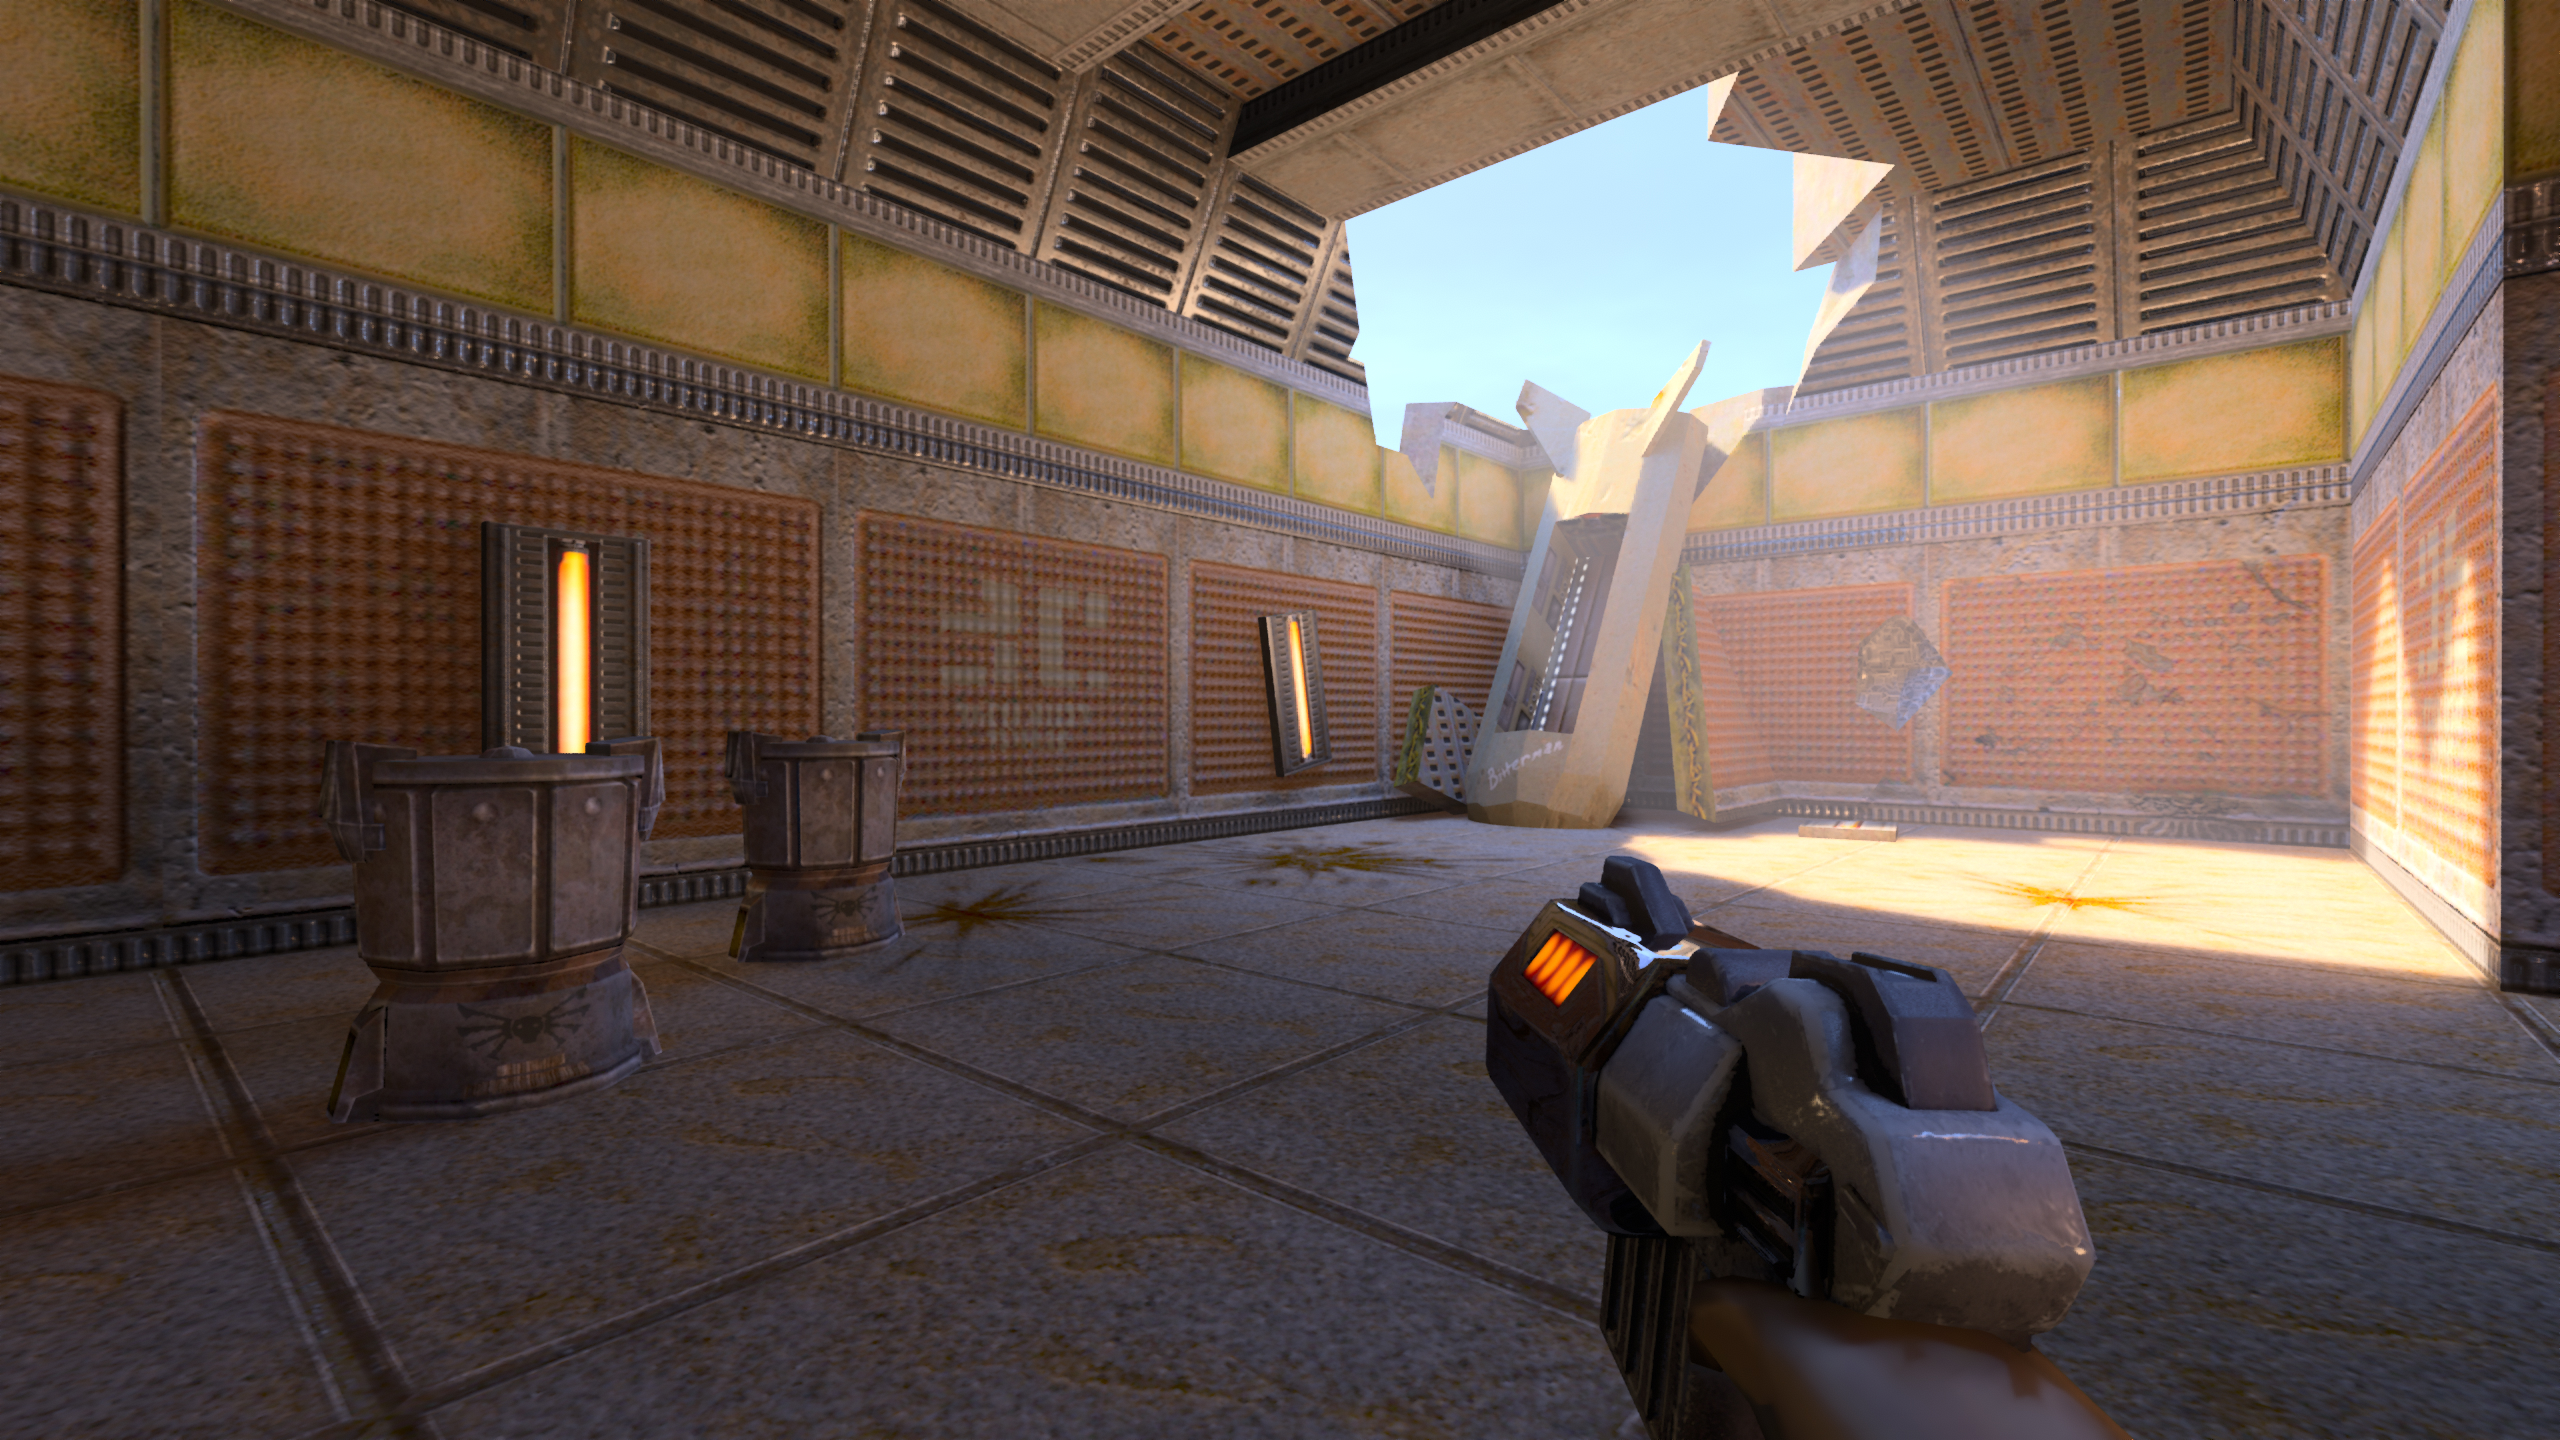
Source: Nvidia
Go creative and use these mods to write your own real time rendering effects for games!
Take a quick search on google and you will see how a well written shaders mod for Minecraft can transform a simplistic game visuals to the next level!
This project can be as simple as adding SSAO for games, or it can be as complex as a fully path-traced visual mods on old games and totally transform the experience.
OpenGL Game (Difficulty Level: 2.0)

You may wish to build an interactive demo scene, or even a small videogame. You are even free to build on top of existing game engines, as long as you clearly separate out what you build on top. Make sure that your project has a technical graphics component. As with other project ideas, take care to specify what the technical challenges are, and what you will build, in your proposal.
Rendering with Distance Fields (Difficulty Level: 2.5)

How many triangles do you need to represent this scene and render it? Two! This article will teach you how to represent geometries using distance fields, and how to render them in real time in a fragment shader!
You can also work on rendering shapes defined by signed distance fields using ray marching or hybrid ray-tracing/ray-marching rendering!
Displacement Maps using Dynamic Tessellation (Difficulty Level: 2.5)

Source: Nvidia
In project 3-2, we implemented displacement maps to change the geometry of an object and add stunning surface details. However, in order to capture fine details, extremely high-poly underlying mesh with very small triangles is required. To solve this problem, we can use dynamic tessellation. It breaks down large polygons into finer pieces only when needed, according to the details specified by displace maps. After that, it sends the dynamically subdivided mesh to the graphics pipeline. By taking this project, you'll learn the state of the art technology for video games! You may also be able to learn DirectX or CUDA-OpenGL interop.
You'll find this article interesting and useful.
Special Rendering Topics
Inverse Rendering for Re-Rendering
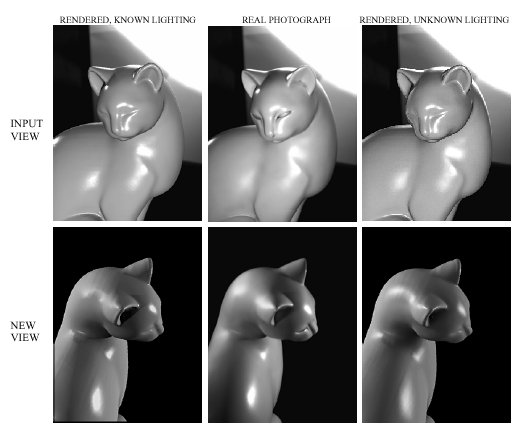
Source: Ravi Ramamoorthi
Inverse rendering can be used to re-render images of a scene from different viewpoints, with different lighting, or with different materials. Think about predicting lighting from renderings with knwon geometry and materials, or predicting materials from renderings with known geometry and lighting! Stephen Marschner's thesis has a nice discussion of interesting inverse rendering tasks.
Non-Photorealistic Rendering (Difficulty Level: 1.5)

NPR, or stylistic rendering, is a technique that attempts to combine artistic flexibility with rendering techniques to achieve clarity, be it in architectural and blueprint designs, or simply greater expressive capability than can be achieved with purely-photorealistic-based-rendering (PBR). Certain topics include sketch-like, cel-shading, watercolor-esque, and more.
Texture Synthesis
Solid Texture Synthesis (Difficulty Level: 1.5)
A solid texture is basically a 3D texture - you can think of it as a function that spits out a color value depending on 3D position. In class, we looked at a technique that generates a new 2D texture from an existing 2D texture.
It turns out you can also generate a new solid texture from an existing 2D texture - take a look at this paper.
Texture Synthesis over a Surface (Difficulty Level: 2.5)
The method presented in class for texture synthesis does not account for the second part of the texture pipeline: texture mapping the output onto a 3D surface. To do this properly, check out this paper.
Geometry
3D Mesh Reconstruction w/ Smartphone (Difficulty Level: 2.5)
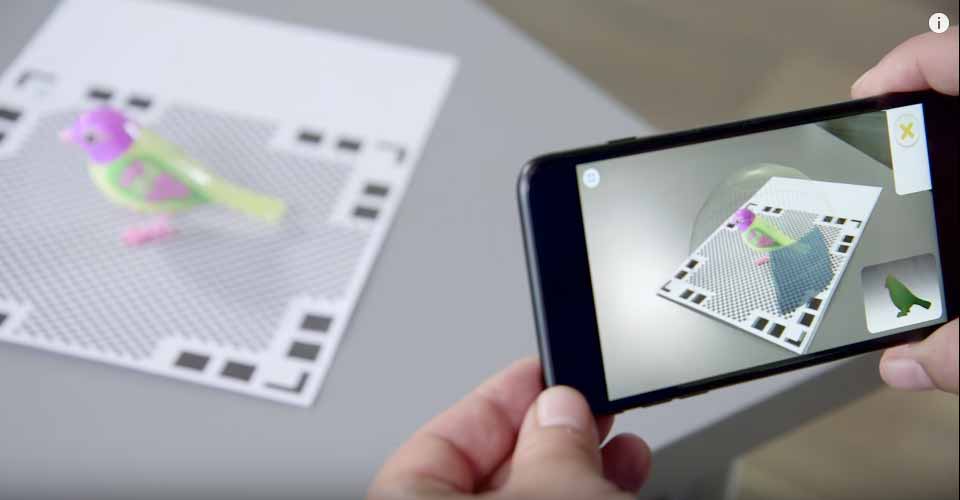
Source: Aniwaa
Write code that reconstructs a 3D object mesh given multiple images (or a video) from a standard monocular smartphone camera. Optionally, package the code as an easy to use smart-phone app, and/or scan an object from the real world and use it as an asset in a 3D scene. For an extra challenge - try to reconstruct complex geometry like that of a human face. Here is reference paper that shows both mesh reconstruction and texture mapping.
Shape Deformation (Difficulty Level: 3.0)

Source: Hui Zhao
Simulate non-rigid shape deformations! Here are a couple example papers for adaptive remeshing: Paper1, Paper2. You can even simulate deformation of point-based shape representations without meshes! Paper.
Mesh simplification & Remeshing (Difficulty Level: 1.5)


Sometimes a triangular mesh uses far more triangles than needed, wasting storage space and demanding more computation time than necessary. To solve this, we can perform mesh simplification, in which we find areas where fewer triangles can be used and then simplify those areas accordingly. In addition, it is also possible to find a better discrete representation of the same surface. Transforming the mesh into this better representation is called remeshing.
Point Cloud to Mesh (Difficulty Level: 2.0)

The goal of this project idea is to convert point cloud input data, which are often obtained by 3D scanners, into a mesh representation. This paper introduces an interesting and easy to understand algorithm that works reasonably well. If you want more of a challenge, you would probably try implementing this paper. To test your implementation, you can find some 3D mesh models from this repository. Then, you can run your mesh reconstruction algorithm on vertices of the input model. Once you have the reconstructed mesh, you can easily compare it with the original mesh from the model. You could even use a 3D reconstruction algorithm to get point clouds from images you capture, and convert these to meshes!
Imaging & Computational Photography
Light field camera support (Difficulty Level: 1.5)


Source: Ren Ng
Project 3 uses either a pin-hole camera or a thin lens when ray tracing scenes. We can extend it to use a light field camera, where each pixel now becomes a grid recording radiance from different directions. Using this grid, we can then move around the aperture and refocus even after the scene has already been rendered. Render some light field images, and implement a nice GUI to show off your results! Play around with custom aperture shapes for cool looking bokeh! Try rendering light fields through realistic complicated camera lenses!
Multi-shot HDR (Difficulty Level: 2.5)
This paper Burst photography for high dynamic range and low-light imaging on mobile cameras (https://hdrplusdata.org/) describes a novel approach to create HDR images using multiple shots / burst sequence of images and reduce noise at the same time.
There are many other ways to performe this, and if you are a seasoned photographer, you might have used similar features in software like Lightroom before. Now you can attempt to achieve this effect using your own code!
Animation
3D Robot/Skeleton Control (Difficulty Level: 2.0)
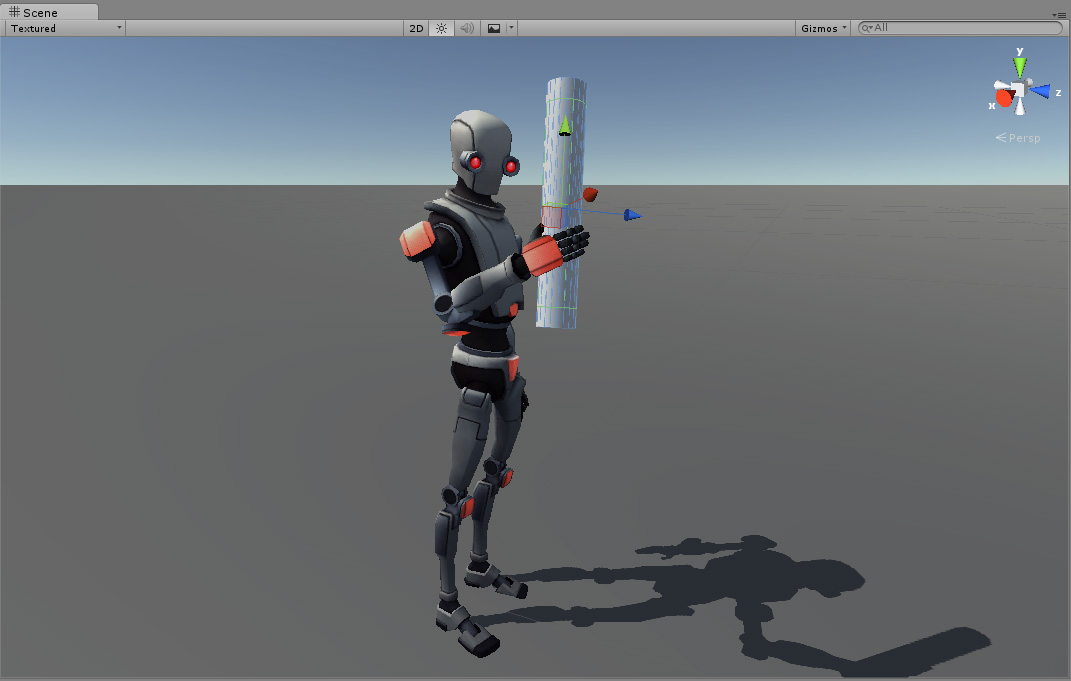
Source: Unity3D
Work on inverse kinematics for solving robot joint angles to make an articulated skeleton robot follow a speficic path! You can even look into controls and reinforcement learning based solutions to make your robot's motion robust to external forces or follow specific motion styles.
Simulation
Rigid Body Simulation (Difficulty Level: 2.5)

Source: Nvidia
In addition to just fluids, we can use particles to simulate rigid bodies. Here is a paper describing the basics of rigid body dynamics. Rigid body simulation can be done in real time on GPU. NVidia's GPU gems has a good article on how this can be done.
2D Grid Based Fluid Dynamics Simulation (Difficulty Level: 2.0)

Write a fluid dynamics simulation that estimates the behavior of an incompressible, homogeneous fluid under the Navier-Stokes equations. You can use GLSL fragment shaders to perform the physics calculations on the GPU interactively.
3D Position Based Fluid Simulation and Surfacing (Difficulty Level: 3.0)


Source: Miles Macklin
3D fluid simulation may sound scary, but don't worry. This paper introduces a not very complicated algorithm for fluid simulation as multiple spherical particles. And from the simulated particles, you can build a surface and render it like real water!
Hybrid Fluid Simulation Using APIC/PIC or FLIP/PIC (Difficulty Level: 3.0)
Source: Disney
Some problems are better suited in Lagrangian frameworks and some, in Eulerian frameworks. There's also a best of both worlds scenario when we utilize the advantages of both approaches. This paper introduces a hybrid approach for simulating APIC/PIC fluid.
3D Snow Simulation (Difficulty Level: 3.0)

Source: Disney
Snow is a challenging natural phenomenon to visually simulate. This paper introduces a hybrid particle-based and grid-based method for snow simulation with various parameters.
Ferrofluid Simulation (Difficulty Level: 3.0)
Take your fluid simulator to the next level and simulate ferrofluid! This paper describes a physics based model and psuedo-code for their methods.
AR/VR
Create a VR App! (Difficulty: 1.5)

Source: Wikipedia
VR enabled devices - like Oculus, Vive, and even cell phones - are becoming more common place in consumer settings. Thus, there is plenty of space to create innovative VR applications (e.g video games, data visualizers, or artistic tools).
For inspiration check out Google Tilt Brush, Beat Saber, and/or Berkeley own VR club!